So you have your supplies and you are know how to make soap but you can’t figure out how to get a soap mold in Manila.
Yes, I know.
You can actually use almost anything for a soap mold. People have recommended shoe boxes and plastic containers and baking molds and all sorts of stuff, but you are a perfectionist and you want to turn out the same size bar with beautiful edges every single time.
This is not possible without a standard soap mold.
So, you want a soap mold and I’m tell you what happened to me when I looked at all the possible ways to get one.
BUY
In which I try to take the easy route and buy online
The first thing I did when I decided to try to make soap on my own was to find my supplies, my tools, and my soap mold.
Hobby stores for soapmaking do not physically exist in the Philippines, so all of my options were online.
Typing in Soap Mold Manila, I found there were several hits.
One guy on OLX popped up offering a package of a 3 loaf soap mold and a cutter for about Php 4,000. Lazada offered a 1 loaf soap mold for Php 700. I decided I wanted a 3 loaf soap mold and asked him to send pictures.
The moment I saw them, I realized that it was a terrible product. The coat on the cutter was wavy and it was yellow. There had to be a better deal out there.
I decided I would have to widen my search.
I checked Brambleberry and their 3 loaf soap mold was $81.00 or Php 4,050. This was just a soap mold, although yes it had inserts but geez. Plus don’t forget shipping at Php 1,351.
This was becoming an expensive date, and I wasn’t even sure I was ready to commit yet.
So, I did the next best thing – I decided to try DIY.
The Online Buy Route
4,050 Php Brambleberry 18 bar birchwood mold
1,351 Php Shipping 5,401 Php Total
DIY
In which I am asked to bribe a salesclerk and I try to hack it myself.
I’ll freely admit it.
This was a total failure. I am not a carpenter and I do not have tools. I didn’t even know where to buy wood supplies. So, I did what works in a first world country and what totally does not work here: I went online to look for a lumber supply business in Manila.
I came up with the following hits: Ace Builders, Wilcon Home Depot, CW, MC Home Depot and some mom and pop hardware stores and sash factories.
This is the approach that you do when you don’t know anyone (I knew someone but he was Big Business and I really didn’t want to bother him) and this is the approach that you take when you follow all the advice on the popular soapmaking blogs.
Right off the bat, I’ll tell you why this doesn’t work. The Philippines is a poor country and all the DIY supplies that you would get in America just aren’t available. The nice supply of lumber of different sizes? Not available. The nice guy who can cut it for you in store? Also not available.
I would have hired my boyfriend but he is Intellectual and does not handle power tools.
So, I called the stores. I called everyone I wrote about and others besides. I was still hoping that I could get someone to cut it for me to the length that I needed it. I was told by one that yes, they would cut it but it would be out in the back and it was Not Official. Specifically, a guy told me that he could cut it for me and that I would just have to “Take care of him.”
I was kind of in disbelief but I still took down the guy’s cell (This is what desperation drives you to).
I called Ace Builder (not Ace Hardware) and I was told that yes, they did cut it. I called all 3 branches after searching wildly for their telephone numbers because surprise, surprise, the numbers are not updated on the website and the internet Got It Wrong and the sales staff kept giving me the numbers for Ace Hardware. (For reference, the numbers are below.)
I decided this was definitely an option.
I went to Ace Hardware but quickly realized that their yes was more of a yes, kind of. Yes, they will cut it for you but you have to buy a jigsaw blade and you have to make a special request to the manager. Also, it was really expensive at almost twice the Lazada cost or about Php 1,500+/-.
One of my stops along the DIY route was to go to a small local hardware. The prices there were really reasonable, with a 1x4x8 at Php 200 and a larger plank at Php 500. But again, the Chinese owner of the shop told me that he had no one to cut it for me, so I was back to where I started.
The DIY Route
334.75 Php 1 pc 3/4″ x 4 x 8′
134.25 Php 3 hinges
29.75 Php 1 set eye and hook
140 Php 1 jigsaw blade 639 Php Total
Job it out
While I was researching the DIY route, I came across referrals to three carpenters who people assured me would do it for me.
The first one wanted to charge me Php 700 for one, while another wanted to charge Php 600 for the whole day. I still have the phone number of the third but I have decided to ask just for a referral. I’m hoping that if I get a referral, he can get it done in half a day.
It is surprisingly difficult to find a carpenter these days. So far, I have had one carpenter back out and another not answer my text.
I estimate that jobbing it out will be roughly the same as DIY so I’ve estimated the below.
The Job It Out Route
200 Php 1 pc 3/4″ x 4 x 8′
134.25 Php 3 hinges
1,351 Php 1 set hook and eye
300 Php Labor 664 Php Total
My soap mold adventure was really educational. I did think that it was going to be a tough proposition if I went the DIY or Job it out route, but I wanted to see what would happen.
The lack of materials and big box home improvement stores that can cut plywood for you really hamper building your own soap mold, and I spent a really long time going around the various shops. I went to back alleys and dodgy places, and I’m still waiting for someone to reply to some of the inquiries I sent out.
The easiest thing is simply to buy one of Lazada’s soap molds.
You won’t have to spend 2 days visiting shops or looking for carpenters, and the price difference of the Lazada soap mold and the DIY stuff is Php 50 or $1.
Php 50 or $1 isn’t a big deal, when you think you could happily be making soap.
Ever decided to try to build your own soap mold? I’d love to hear it.
Buying cold or hot process soap in Manila has many benefits:
#1 It’s healthier and so much better for your skin
The ingredients in today’ soap bars are often bewildering. Liquid soaps will list parabens, preservatives, surfactants and fragrances. Triclosan is often included. Pretty much all have been shown to be bad for your skin or your health.
These chemicals are hormone disruptors and some are even known carcinogens at high doses, but often big companies get away with it because there really isn’t anyone policing or penalizing them – most enforcement is after the fact. They also often allege that low doses are safe.
But think about it – when animal studies show reproductive diseases at high doses from products that you use ever single day, maybe it is better to be safe than sorry.
Additionally, people who suffer from skin allergies have found that switching to a natural bar is so much better for thier skin. The itchiness goes away and skin allergies improve.
If your skin is sensitive, switching to natural soap bars may alleviate your symptoms.
#2 Its environmentally friendly.
Natural soaps are much more environmentally friendly than what we often buy off the shelf.
Grocery store soap is made in a factory, consuming tons of energy and ingredients that extend shelf life and make it easier to ship but that are a drain on natural resources. It doesn’t stop there. Transporting the product – often across international lines – is an energy and resource intensive endeavor.
When you buy natural soap, very little or no energy is needed. Cold process soap is formed entirely through a chemical reaction and hot process soap is formed with minimal heating. Additionally, transportation and packaging are much less.
#3 It supports the local economy
Several cold or hot process soap makers are small local businesses such as Milea Bee Farm or Ilog ni Manila. They cut and produce the soap in small batches using local labor, and the profits often go into supporting the local economy.
Its a virtuous cycle of return back into the places we care about and are close to our homes, and I just can’t see any downside in that.
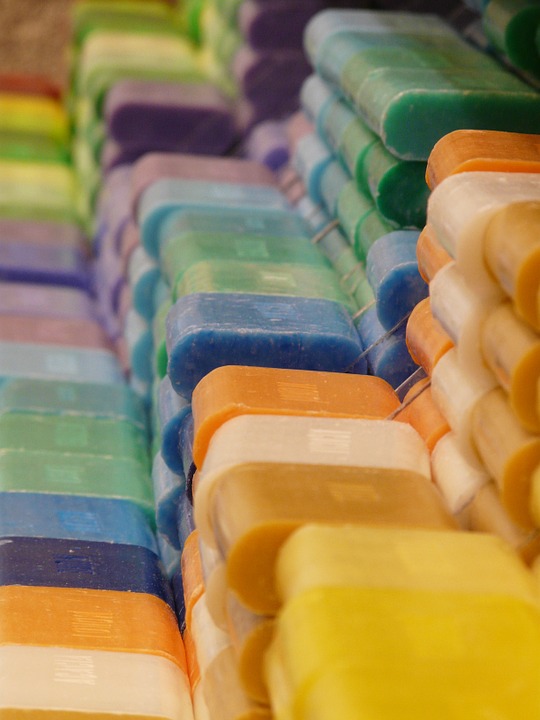
#4 It is unique and beautiful
Via Pxhere
Cold process or hot process soap is beautiful and eye catching. Some of the local soap creators make eye catching bars that can’t be found anywhere else – think deep chocolate swirls and pumpkin pie bars.
When people wander into your bathroom, they’ll often be pleasantly surprised by a beautiful bar of soap that’s often a small testament to someone’s imagination.
And, no matter how tiny, why not be surrounded by beautiful things?
There are tons of online guides and great books on it, and when I started I read tons of stuff to make sure that I was doing it right and to counter check with other sources since I noticed some inconsistencies. In fact, my own comprehensive guide on soap making developed from my notes.
Still, sometimes it is pretty comforting to have someone sit down with you and go through it step by step. People get especially nervous around lye and have several concerns handling it for the first time.
There are classes everywhere for aspiring cold process soap makers, no matter where you are based in Metro Manila.
Makati
Craft Manila is located in the Pamana Building on Pasong Tamo in Makati. They’ve tons of classes, which run the gamut from book binding to jewelry making.
Their soapmaking class is taught by the proprietor of Simoy ng Harana, an online shop of scents that have been featured on Real Living (the best interior design website in the Philippines), and is Php 5,500 with a maximum of 8 participants.
While the most expensive of the classes I’ve found, it’s got a great track record and is centrally located, so you pay for convenience and expertise. They’ve partnered with Rockwell Malls and other well known companies to teach workshops on just about anything so these guys are pretty legit.
I find them really responsive on email while usually other businesses are more comfortable on cell or private messaging.
Email: hello@craftmnl.com.
Quezon City
Negoskwela has a plethora of courses for people who want to turn their crafts into a hobby, and I wish they were located somewhere easier to get to. People who are crafty who’d love to develop their talents but have got work might have a hard time getting here.
They’re located in CMLI Bldg. North Ave. Cor Agham Rd Diliman Quezon City and their day long soap making course is Php 2,800. I like their thrust of empowering people through entrepreneurship.
Email: info@negoskwela.ph
Landline: 924-5111 and 208-7211 to 13
Sun: 09253685306| 09253685307 | 09253685308
Smart: 09088124223
Globe: 09175118019 | 09175117925
Their soaps look absolutely delicious, and they’re at 04 Asogue St, Tugatog, Malabon City. Their website and video tutorials are on the web, if you’d like to check them out.
Soap Central is also pretty active on Facebook, and is at the LaRychean Building at 176 Tunasan Road in Muntinlupa. If you’re from the South, this is the prefect place to start. I think they are a great resource, and they are open every day till 6pm.
If you are thinking about taking the class in 2018, they’ve got you covered: they’ve already released the schedule for the year. They have classes on formulations for Php 2,500 and hands on cold process soap making for Php 4,500. they’ve got a free soap mold for those that sign up a month early, so sign up early! 🙂
Lipsticks that cause allergic reactions? Mascara that causes eye irritation? If you’ve bought a product that has caused a health issue, it might be a good idea to file a consumer complaint with the Philippine FDA or with the DTI.
Many consumers believe that the government makes sure that the ingredients in their cosmetics have been thoroughly investigated and tested before they are ever used.
Nothing could be further from the truth.
The Philippine FDA is pressed for resources and manpower. The FDA itself notes this in its progress report, saying:
“…the current number of FDA personnel is inadequate and its expertise has remained virtually unchanged considering the rapid development of regulation in an array of products…”
It goes on to state that 1,200 people would be the optimum staffing and that the current staff is 300 technical staff and 179 inspectors.
In Mindanao, the appointment of personnel made the news in the article FDA’s enforcement unit now has 4 armed personnel. It also states that the head fears that 4 might not be enough to cover the entire eastern Mindanao.
Since Mindanao is 104,530 km2 and eastern Mindano might conceivably be half of that, I can see his concern.
So, while there might be great laws and intentions, there aren’t enough resources to enforce.
Aside from that, the cosmetics industry has thousands and thousands of chemicals that are allowed in use without any safety information available or any testing. The attitude is that when something happens, then they’ll stop using it.
That covers those substances that are immediately fatal, but completely hides the bad effects that arise from the slow build up of toxins and daily exposure to subtle and harmful chemicals.
With weak enforcement of laws and a lot of unknowns, it is probably even more important that the consumer step up.
How to file a consumer complaint
Filing a consumer complaint in the FDA is pretty straightforward.
It’s mainly sending an email through the FDA email report@fda.gov.ph, although there is also a customer complaint form that is present on the FDA website.
There are guidelines for its processing, and are fairly basic. A report is filled up either by the consumer or an FDA officer if notified through the phone, with laboratory testing to follow if the criteria for acceptance is met.
For cosmetic products, criteria for acceptance is:
A notified cosmetic product,
Registered household hazardous substances and pesticides,
Sample is not yet expired,
Suspected presence of adulterants and contaminants, as specified by the CCRR, and
Adverse reaction occurred despite use of product as directed (to be accompanied by a medical certificate, or as certified by the CCRR or the CDRR.
While I’ve written what I know about the process of filing the complaint, I wonder whether the agency is able to address these complaints quickly.
I’d love to know if anybody’s filed one and what has happened to it – there doesn’t seem to be much information on it yet.
This Easy Handmade Soap Guide for Beginners is for people like me who want to make soap but get confused because they come across lot s of contradictory information.
So I wrote a guide to try to help other people. I explain how to make soap here, but I also try to resolve questions you might have come across yourself.
I’ve got things like whether to use tap or distilled or whether you really should put vinegar on that lye burn, and I’ve put my sources if you’d like to check them out yourself. I’ve also split up the post so that people can go back and forth and choose how much they want to read.
I’ve made 4 sections, and written down problems or info I offer right after.
Ingredients: Different olive oil classifications and which to choose, lye grades and what to buy, and whether to use distilled versus tap water
Equipment: Should you use water or vinegar for emergencies?, Is glass better than plastic for our lye water mix?, and stick blender and equipment specs
Process: An discussion of why Castile soap doesn’t require oils to be heated, and the different types and uses of trace
Cleanup: which is so unglamorous no-one talks about it
Ingredients
The easiest handmade soap for beginners is Castile Soap.
Made of only 3 ingredients, this DIY Soap is a traditional recipe composed of olive oil, lye, and distilled water. It is very mild and gentle and is often used for babies and those with sensitive skin. It’s also inexpensive.1
It does take a while before it can be used. Unmolding takes 2 weeks and curing is another 4 to 6. Veteran soap makers say that best results are after 10 months, which I’ll admit is a heck of a long time to wait.2,3
We’ll make a small test batch of 1 pound batch of soap, making 4 bars of 4 ounces. There’s a little allowance since you’ll never get all the raw soap out of the containers and there’s some water shrinkage. It’s a short ingredient list:
It really can’t get simpler than that. Plus, it’s an oldie but a goodie, tried and tested through centuries of use since its inception in the Middles Ages. What else could you ask for?
For those who want to get going, skip ahead to the Equipment Section but for those who have questions on the ingredients, I’ve written a few things about olive oil grades, the kind of lye, and the debate on water.
Olive Oil
If you are a perfectionist, this is where you start to worry.
Should I buy extra virgin? What about pomace olive oil? What is pomace olive oil?
Based on the USDA4, there are 2 main types of olive oil and several subcategories under them. We are most familiar with food grade olive oils such as extra virgin, virgin, refined and regular olive oil and less familiar with pomace olive oils, which are intended for further refining for human consumption or technical use.
But here’s the thing – let’s keep it simple.
Since the fatty acid structure of the oils are the same, the soap produced is going to turn out pretty similar. Some soap makers will avoid pomace olive oil since it can produce a bar with a stronger smell, but the properties of the bar will be the same as other olive oil grades.
Buy the grade you prefer. Choose a reputable supplier since some groceries stock olive oil with other oils mixed into it or have old stock.
Just to illustrate my point, Soap Queen5 tested Olive oils from the grocery shelf and soon found that they exhibited rancidity – this is when the oils go bad and ruin both odor and appearance with little orange spots.
So, make sure you get fresh 100% Olive Oil without any additives and you’re good to go.
Sodium Hydroxide or Lye
There are two types of lye. Sodium Hydroxide (NaOH) is used for making bar soap while Potassium Hydroxide (KOH) is used for making liquid soap. Liquid soap and bar soap have different formulations by the way so if you plan on making a liquid version, don’t just substitute one for the other.
Since this is a bar soap recipe, we’ll be using Sodium Hydroxide.
Usually, Sodium Hydroxide can be found in hardware stores at tech grade or sometimes food grade. Tech grade contains more impurities and some say they can tell the difference in their soap.
But tech grade is commonly used by big suppliers and several crafts people have reported using it, so grades seem to be a matter of personal choice. Buy 100% lye without additives and your soap should turn out well.
Also, a word on safety.
Lye is pretty caustic so it can hurt if you don’t take the proper safety precautions and wear the correct equipment. I’ve included a mini-homily on lye down below and the right safety equipment because I can’t stress safety enough – soap making should be fun, not hazardous!
Yes, I know. Yet another lengthy debate about ingredients!
Tldr: you can use tap.
Some people only use distilled water because they say that some hard water has such a high mineral content that impurities abound. They say distilled is better if you don’t know the qualities of your water because it ruins a soap batch. Others say that they’ve used tap and the bars turn out fine.
Sooo…
Tldr: you should be fine with tap. 😊
Equipment
It can be tempting to use items from your kitchen, but remember that once you’ve used them for soap you should never use them again for food.
Below is a list of basic soap making gear for Castile soap or really simple recipes. There’s a lot of other auxiliary stuff you can get for fragrances, essentials oils and colors, but it’s really not needed for Castile.
Personal Protective Equipment or PPE such as safety goggles and rubber gloves and practical measures such as wearing long pants, long sleeves and closed toe shoes. Also, always work in a well-ventilated area near a source of running water in case of spills.
An accurate scale with ounces, grams and pounds which can handle at least 5kg unless you’d like to make even bigger batches of soap. A Tare function is definitely recommended.
A thermometer which is preferably no-contact and handheld
A lye water container of polypropylene (PP 5) with a spout and handles. Others have recommended glass or stainless steel but both are problematic.
Cleanup Supplies such as paper towels, dish cloths and black garbage bags for dealing with the mess.
Eager to start? You can skip ahead to the soap making process but I would strongly suggest reading the PPE section. Safety should always come first!
Below, I’ve added a few tips on what to look for in equipment. Before I bought anything for soap making, I spent a month reading up on what to buy so it’s chock full of my notes as I made my way through soap making.
Personal Protective Equipment or PPE
Okay guys – this is where we get serious.
Lye is the number one reason that most people are wary of making their own soap.
Lye is a caustic base meaning that it is corrosive when it comes in contact with skin and several metals. It eats away at hair and can cause blindness. It’s a pretty harsh chemical by all standards.
There’s a lot of conflicting information about how to handle lye spills or what to do if solid flakes come in contact with your skin. Some people say flush with vinegar while others say not.
But think about it.
What happened when you were in the 1st grade and you put baking soda and vinegar together for the volcano science project? Do you remember the eruption?
When you put an acid like a vinegar and a base like lye together – even weak ones like these – you get an explosion.
Not good.
Water will also cause a reaction but it will be weaker than one with an acid.
To be extra sure, check out the guidelines of the Center for Disease Control7 or the Canadian Center for Disease Control and Prevention8. For contact with eyes or skin, use water and irrigate for 60 minutes. If a lot has been inhaled, move to an area with lots of fresh air. In all cases, get medical attention promptly, especially if ingested.
So that’s why I’m stressing safety right here.
Be careful when handling lye. There’s no way to make soap without it unless you do a melt and pour, so it’s really important that we treat it with respect.
There will be some inevitable spills but hazards can be quickly reduced if you have the proper PPE. Always choose equipment that is a tight fit – a lot of accidents occur simply because a sleeve was snagged or a loose glove caused a container to fall.
Hands
According to OSHA9, Neoprene, Latex/Rubber, Butyl, and Nitrile glove are graded VG for both sodium and potassium hydroxide.
Always check before starting for leaks and tears and replace as needed. Always use gloves with a good fit, since many accidents happen because the gloves didn’t allow a firm grip.
Body
Cover up!
Wear thick, tight fitting jeans and long sleeves to make sure there’s an extra layer if lye does spill on you. Use close toed shoes to protect your feet. Some people also wear a leather apron.
And move fast! Remove the clothing immediately and continuously flush with water if you do get a spill.
Eyes
Goggles are necessary.
Others may prefer full face shields and I can understand why! I came across a soapers forum where someone had nearly been blinded when lye splashed into her eyes.
Use safety goggles – prescription glasses are not enough. Safety goggles that seal completely around the eye. This way, if something splashes from the side, you’re covered.
Well ventilated area
Always work in a well-ventilated area with running water. In case you do get a spill, you can immediately start washing with water.
Stick Blender
I don’t have personal experience with all the brands – who does? So instead I read up massively on them and tried to figure out what I needed before spending a penny.
What I learned is that they will break and there is a lot of personal choice.
I found that a stainless steel shaft of a single piece construction is preferable because it wears well and is more sanitary. A detachable shaft is easier to clean. I also found that the deeper it could be submerged without liquid touching the motor allowed for bigger batches of soap and less spillage. A longer cord is preferable so you can move around easily.
Don’t spend too much. Buy something that will do the job and then as you get more confident (and when it breaks 😊) buy something else.
An Accurate Scale
I remember thinking that since I had measuring cups, I really didn’t need to buy a scale.
That couldn’t be more wrong.
I definitely needed a scale. A scale measures weight or mass and it is mass that that determines how much lye is needed.
Each oil has a different mass because it is made up of different fatty acids. Long chain fatty acids need less lye since they have less carboxylic functional groups per gram than short chain fatty acids.
Get a scale that is sturdy, has a flat top that can take at least 5kg of weight and can measure in ounces, pounds and grams. A tare function is also helpful since it allows you to disregard the container’s weight and just measure the contents of the container.
Splurge on this – you’ll need it as a serious soap maker!
A thermometer
Temperatures are important!
Too hot, and the soap can rise up out of the old like a volcano or have a puckered, wavy surface. Too cool, and soda ash forms on top of the soap.
The usual range for soap making is 120 to 130°F or 49 to 54°C mainly because this is where most butters and oils melt and where lye traces at the right speed.
I find there are pages and pages on the effect of temperature on soap – controlling it can be useful depending on what you want to accomplish.
Temperatures needed vary, especially for advanced soap making. You might want to add milk or avoid gel phase. You might want to intensify colors or work with solid beeswax. These are all examples of what you can do with temperature control, although they should be done for later projects.
Temperature control matters and so, buy a good thermometer if you plan to be a serious soap maker. For Castile, you really just need to check that the lye is at 120°F or 49°C.
You might use a candy thermometer but I’d like to suggest a temperature gun. This is so much easier than cleaning your thermometer all the time, and I really can’t imagine anyone who wouldn’t like a little shortcut.
A lye water PP 5 plastic container with a lid
Buy something larger than needed with a handle and a spout to control pouring and reduce possible spills. A lid also helps to prevent spills. This is still lye that we are working with, so any spill or splash can be dangerous!
Heat resistant glass is recommended by more than one website. Less commonly known – but apparently true – is that Pyrex shatters after many uses12 since the lye can etch small scratches in the glass, which causes it to break. Apparently, lye reacts with the silicates in glass – although this is a sloooow process – and scratches the glass causing it to shatter or even explode.
I’d just skip it.
I’d use heat resistant plastic as polypropylene can handle boiling water and wouldn’t chemically react with lye. Find the PP 5 stamp which is usually at the bottom of the container, and you’re set13,14. Remember to use just PP 5 since others are graded for lower temperatures.
A Stainless Steel Spoon
A long handled stainless steel spoon or whisk for stirring lye solution. Avoid wood since the lye eats away at the wood and you’d have wood splinters in your soap.
A Stainless Steel Pot
I’d go for a stainless steel soap pot for mixing my oils and lye solution in since this allows me to melt my oils in it after measuring and then add in the lye. I completely avoid having to transfer to a new container, so automatically less cleanup and much more convenience.
Also, grab something with good strong handles so that you can easily transport it from one area to another and avoid accidents.
A Silicone Spatula
Silicone Spatula to remove all soap batter from the soap pot. Again, avoid wood as splinters may end up in your soap.
Soap mold
There are tons of soap molds. You can use wood, plastic, silicone or many items around the house.15
Wood molds can used for hot process as well as cold process soaping and have great insulation. The only thing is they must be lined since wood is porous and absorptive.
There’s quite a bit of debate around what liner to use since people have reported differing results16. Wax paper is reported to melt into soap and parchment may not be too durable. I have not heard any complaints about freezer paper however, so that is what I would buy.
If you don’t want to line your molds, silicone molds might be a good option. It is easy to take soap out and they are also easy to clean though soap might take longer to unmold.
Plastic molds also do not require lining but are often less sturdy than silicone. They also take a longer time to unmold.
Recycling a container is also perfectly fine and just require lining. Also make sure that there is a little “give” in the mold so that you can remove your soap. One of the saddest things is having a perfectly formed bar and then realizing that it’s impossible to remove from the mold.
In any case, you’ve got options. So long as you line your mold and can remove the soap easily, you should be fine.
Soap Knife
Knife for cutting your bars of soap which should not be serrated so that you’ll have a nice smooth edge.
Cleanup Supplies
Paper towels, dish cloths and garbage bags to deal with the mess.
For more complicated recipes, you’ll find that you need to have mixing bowls for fragrance, essential oils and different colors of batter; mixing spoons, spatulas and whisks as well as other tools such as funnels, squirt bottles, small mixers and coffee grinders. It all depends on how far you want to go.
Process
Finally, we’re ready to go!
If you’ve read the ingredients section, you’ll have found your 100% olive oil, your sodium hydroxide and decided on your water.
The equipment section will have put to rest the confusion you might have felt on deciding on the materials for your lye water pot and the correct materials for your stirring tools. I hope the emergency procedures for lye accidents and personal protective equipment or PPE were also clearly understood – be careful when working with lye since its corrosive.
I’ve written down a super duper easy to follow procedure below with several pro tips and quick explanations to help us beginners along. Keep safe!
Step 1: Prepare your workspace by making sure you’ve got enough space to work, covering it with newspapers or cardboard, and setting out your equipment. Make sure it’s clear of tripping hazards, well ventilated and near a source of running water in case of accidents.
It’s also really helpful to set out your equipment and pre-measured ingredients in the order that you’ll need them. I’d also line the mold with freezer paper so that you can immediately pour the soap. I’d reserve bringing out the lye until you are ready to start – just to be on the safe side. 😊
Step 2: Put on your PPE. This includes safety goggles, gloves, tight fitting pants and long-sleeved shirts, closed toed shoes and an apron. Please do read the PPE section to make your you’ve got the right protective gear!
Step 3: Measure your water and place in the chemical resistant PP 5 plastic container. Measure your lye and add to the water slowly. Stir and then wait till the solution is clear.
Pro tips:
Always add lye to water because otherwise it explodes.
Add lye slowly to water to ensure control and minimize splashes.
Water should be at room temperature and not hot or even lukewarm to avoid over-heating.
To speed up the cooling down of lye, you can use cold water, use ice cubes for half of the water, or put the lye solution in a sink of cold water. Don’t put the lye solution in the ref – it’s fumes are dangerous.
Use every bit if lye – saves clean-up after!
Step 4: Measure your oil into a large stainless steel or PP 5 plastic pot.
Step 5: Add the lye solution into the oils when your lye water solution is 130°F or 54° Minimize bubbles by pouring the solution slowly or by pouring it down the shaft of your stick blender.
Lots of recipes mention that the oil and lye should be within 10°F or roughly 6°C of each other, but so long as the oils are above their melting point – i.e. they are liquid – you’re good.
Pro tips:
Avoid air bubbles by tapping the stick blender on your container’s bottom. When no more air bubbles rise to the surface, you’re good.
Run your stick blender in short bursts to avoid overheating the motor.
Submerge your stick blender as far as it can go so that soap doesn’t end up flying around. Lye’s still pretty harsh at this point so it’s best to be safe.
Step 6: When everything is thoroughly mixed, it begins to thicken to the consistency of cake batter. In soap making lingo, this thickening is called trace. Trace indicates that soap has begun to form.
There are 3 types of trace:
Light trace is the consistency of light cake batter
Medium trace has the texture of heavy cake batter and is when we add ingredients that we’d like to remain suspended.
Thick trace is when the soap holds its shape after its been poured. Like frosting, it can be used to make decorative tops and textures.
Beware of false trace or of using soap batter before everything has been fully mixed.
In false trace, thickening occurs because the oils have started to solidify. Oils solidify when they’re below their melting point so keep an eye on temperature!
Sometimes soap will be poured into a mold when it hasn’t properly mixed. Streaks of oil indicate you should keep on mixing since if used at that stage, pockets of harsh lye may appear in the final soap. This would be dangerous to use.
For Castile, our oil is liquid at room temperature and all we need to hit is medium trace, so we just have to make sure that we mix really well. Castile takes a while to trace, so don’t worry if it takes longer than you’d expect.
Step 7: Leave the soap in the mold for 2 weeks, since this is an especially soft soap. Unmold and cut and cure for an additional 4 to 6 weeks. It can already be used after this, but best results will really come after a 10 month cure time.
And that’s a wrap!
😊
Cleaning up
Clean up’s boring – but necessary! The lye is still active and needs to be disposed of properly.
When you use as much batter as you can, there is less clean-up plus more soap, so use that spatula when you’re emptying your soap batter into the mold.
Oh, and don’t put things in the dishwasher – there’s still lye on it so you should avoid mixing food and soap making equipment. Better safe than sorry!
Step 1: First, make sure you still have your protective gear on. You’ll need it since the lye is still harsh.
Step 2: Make sure the area is still secure from small marauders like children and pets.
Step 3: Collect your equipment and move it to the sink. I would deal with the raw lye water items first and then the containers that have the oils and raw soap batter.
Step 4: Rinse items that have lye water solution residue such as your lye water container and lye water stirrer.
Step 5: Remove as much raw soap batter and oil from your equipment with rags to prevent pipes clogging. Put the rags in a plastic bag when done. Rinse with hot water and a strong degreaser or detergent.
Alternatively, you can leave your rags for 24 hours in the plastic bag. It will then become soap and should be easy to launder. Personally, I don’t do this simply because I think it might not be good for my washing machine, but that’s just me.
Step 6: Strip your working surface of newspapers or cardboard and wash with water. Wipe down and spray with vinegar.
You made it (In more ways than one; that was a long guide)! Congratulations!
FOOTNOTES:
Cavitech, Susan. 1997. The Soapmaker’s Companion. United States: Versa Press
Faiola, Anne-Marie. 2016. Pure Soapmaking: How to Create Nourishing, Natural Skin Care Soaps. North Adams, MA: Storey Publishing.
Gail, Amanda. 2008. Private Soapmaking Class, Pyrex and Lye, Essential Oils and Plastic [Weblog] Lovin’ Soap. 5 December 2015. Available at http://www.lovinsoap.com/2015/12/private-soapmakin g-class-pyrex-and-lye-essential-oils-and-plastic/ [Accessed 15 June 2017]
Can A Polypropylene Container Hold A 10% Solution of Sodium Hydroxide (lye, NaOH)?. 2012. [online] Available at https://www.quora.com/Can-a-polypropylene-containe r-hold-a-10-solution-of-sodium-hydroxide-lye-NaOH [Accessed 22 June 2017].
Faiola, Anne-Marie. 2016. Pure Soapmaking: How to Create Nourishing, Natural Skin Care Soaps. North Adams MA, USA: Storey Publishing.